How do I operate a Westlake Hall HyFlex room?
A brief guide to getting started in Westlake Hall Hyflex rooms

Garrett Livingston
Last Update 3 years ago
Note: Detailed articles about the specific technologies available in these spaces can be found at the bottom of the article

Westlake Hall HyFlex Quick Start Guide
1. Connect your laptop using the HDMI Cable included in the podium.

2. Select your Source on the touch screen
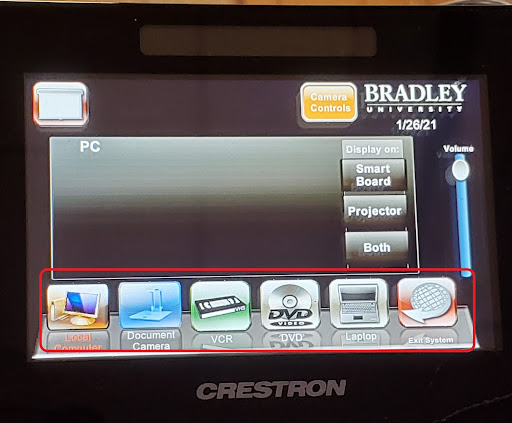
Note: Local Computer is the instructor PC
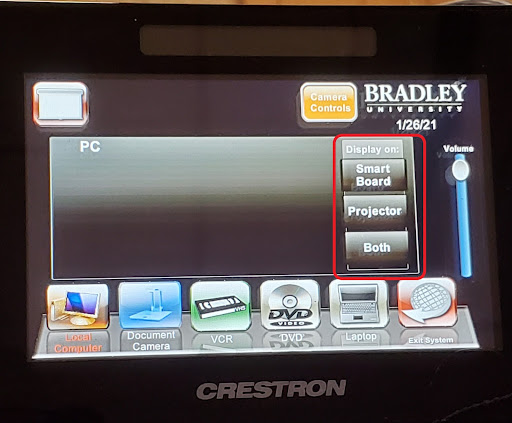
3. Select which monitors/projectors you want to send your source to
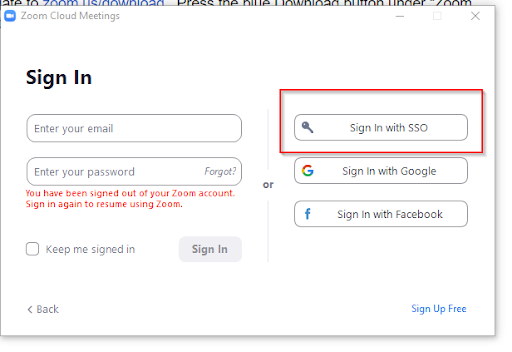
4. Launch the Zoom App on the Zoom PC
a. Click Sign in, and Sign in with SSO. Enter bradley into the field.

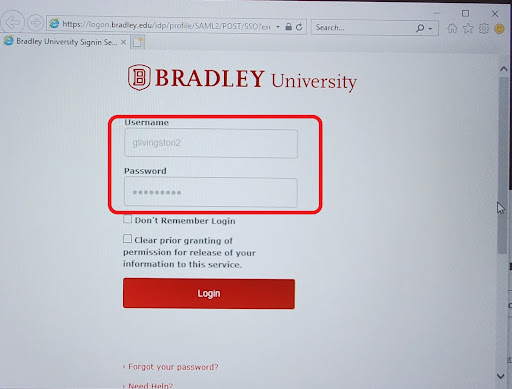
b. Login with your BU Username and password in the window that pops up
c. Start a meeting
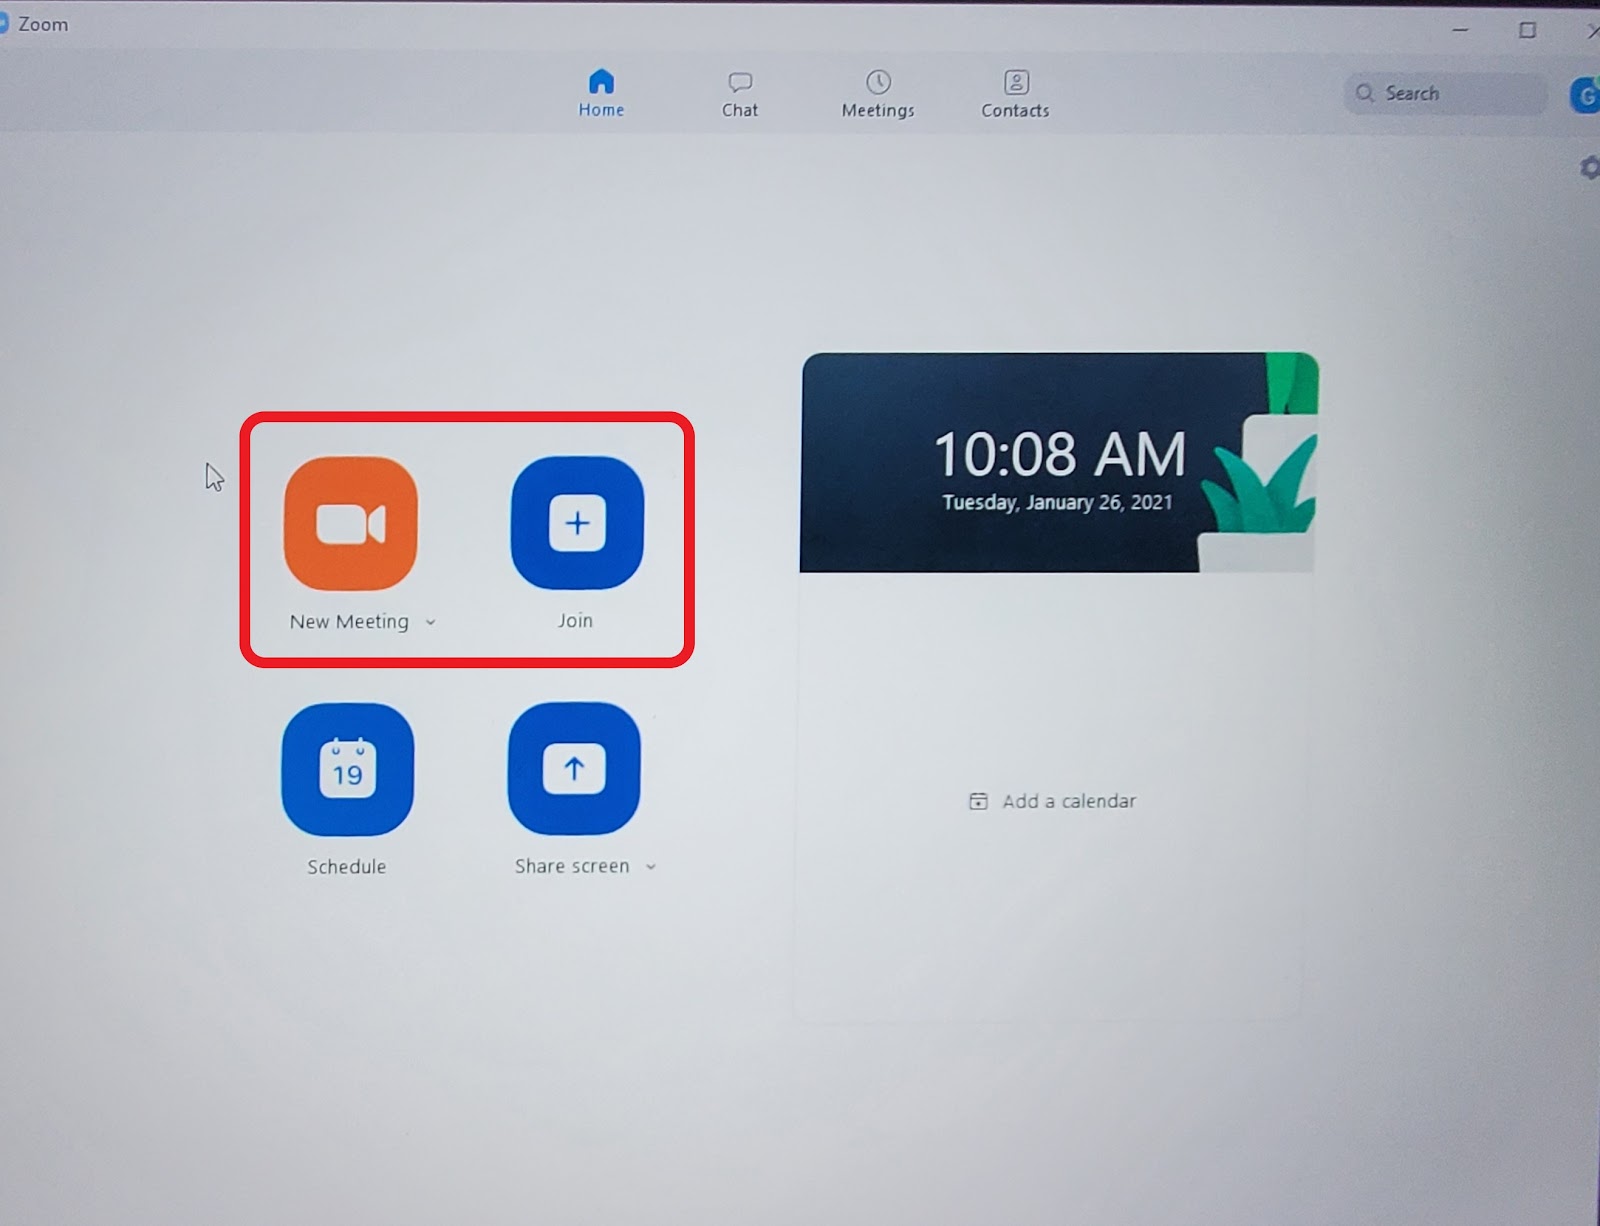
Note: If you have a meeting ID already created, please click join
d. Test Audio
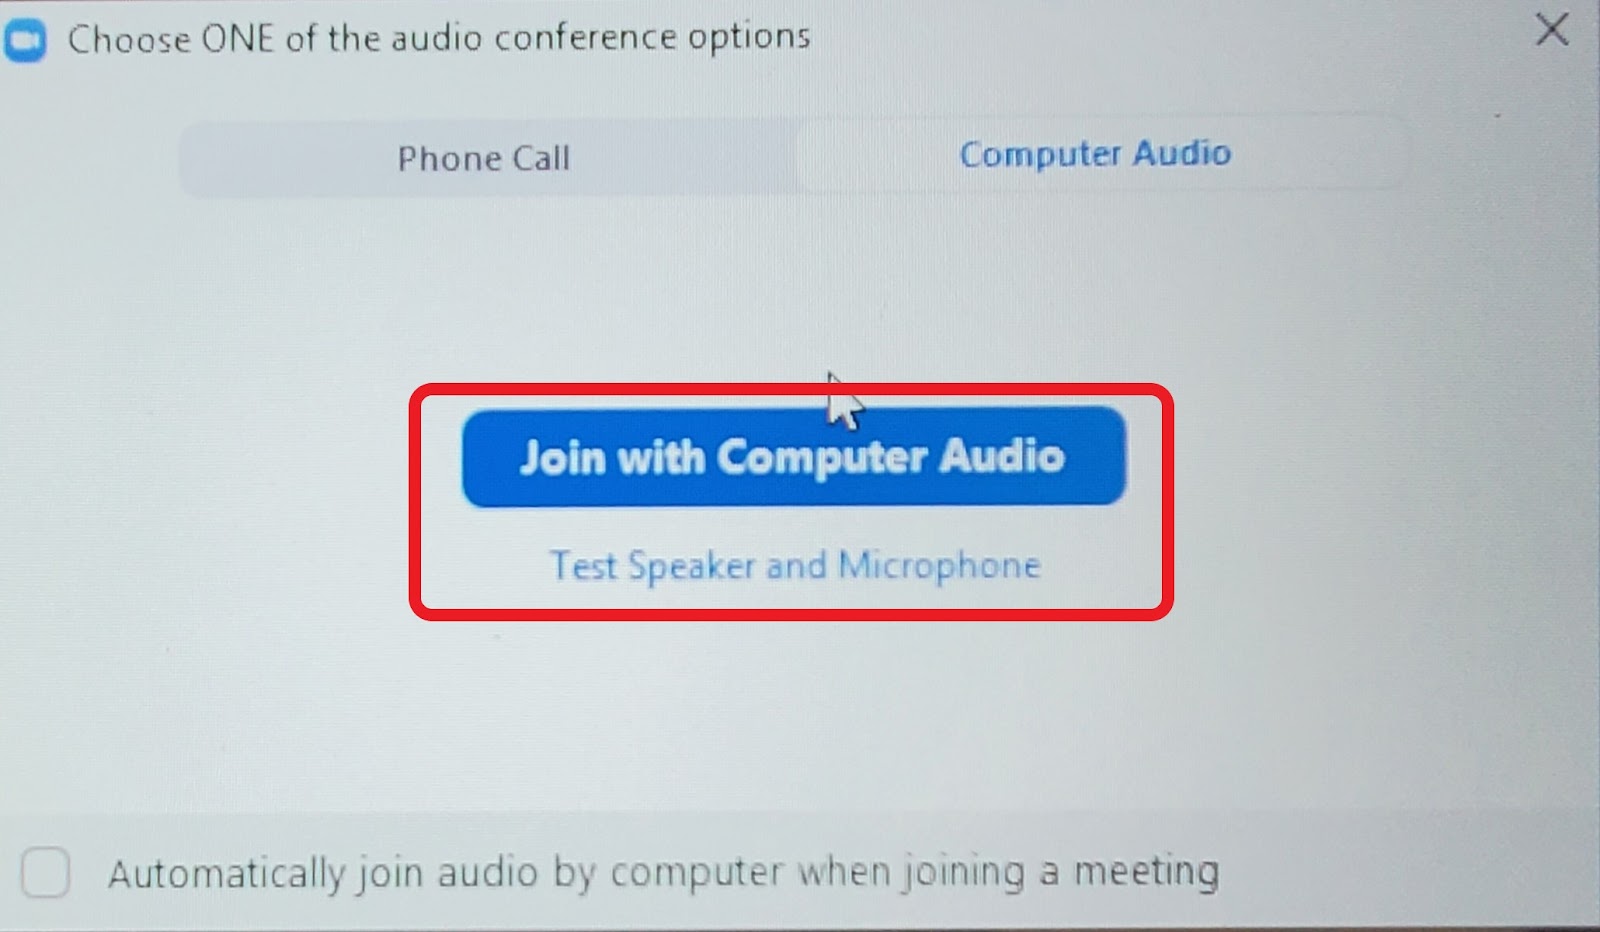
e. Join meeting with Computer Audio
f. Then Select or enter the appropriate meeting ID
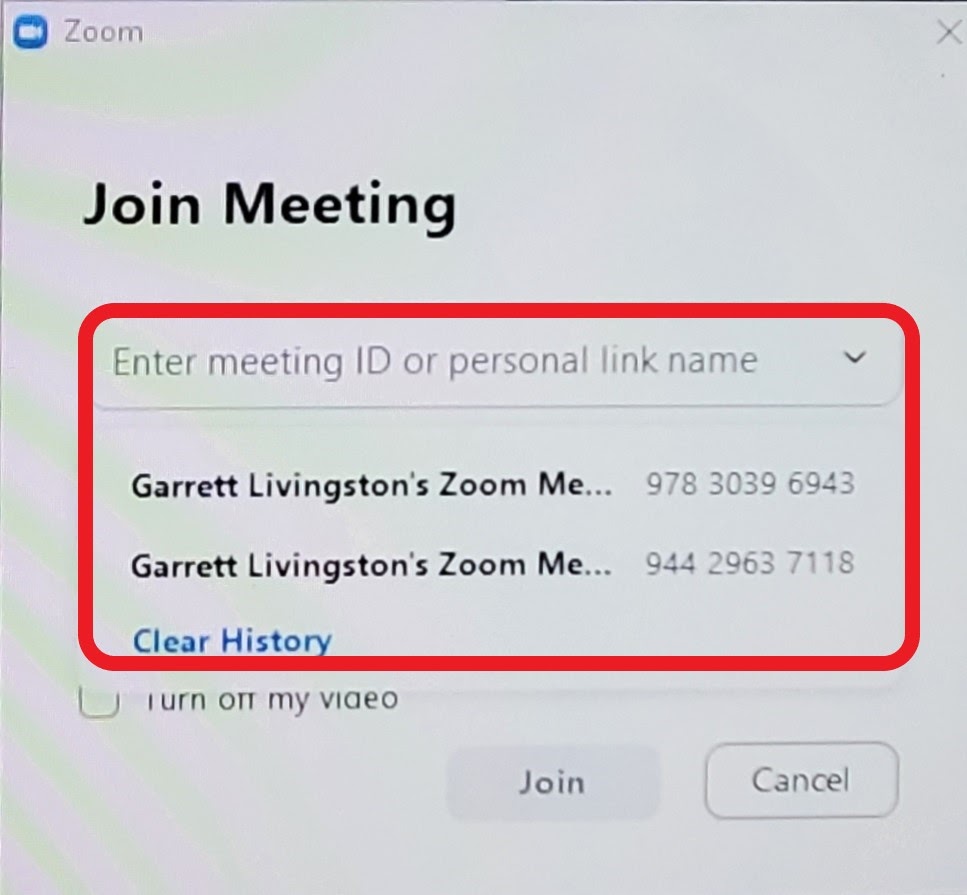
g. Students attending remotely will need 11 digit Meeting ID
5. For rooms with multiple cameras, Select your camera on the touch panel
a. First Select Camera Controls
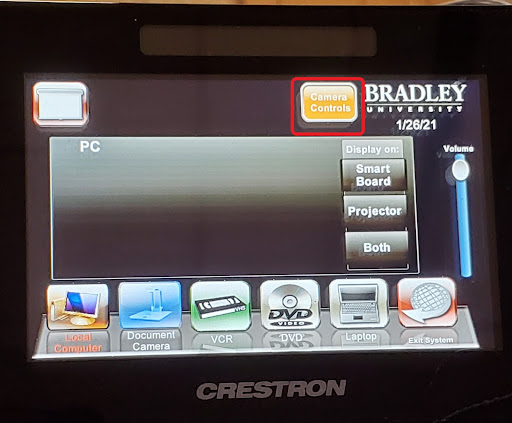
b. Then Select your camera
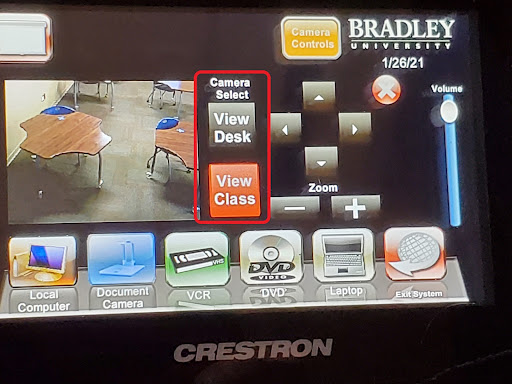
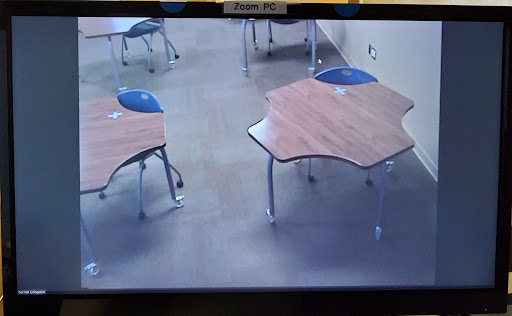
You get a preview of what remote students see on the touch panel
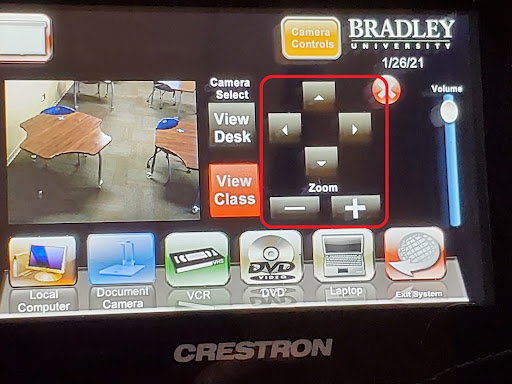
6. You can control the room camera(s) via the touch panel
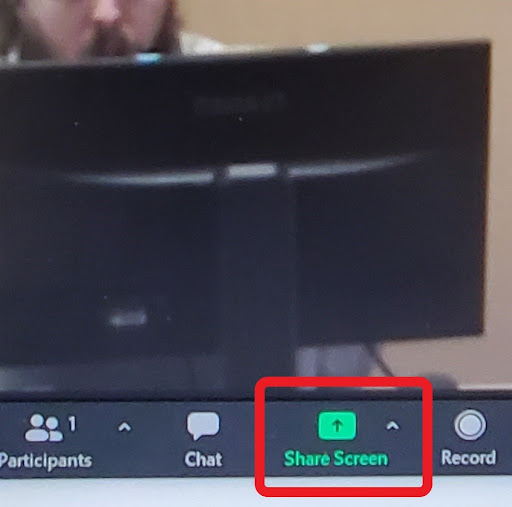
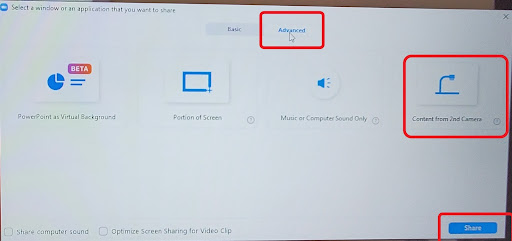
7. To share your laptop screen with the Zoom meeting
a. Click “Share Screen” in Zoom
b. Click “Advanced”, then “Content from 2nd Camera”, finally “Share”
This guide applies to Westlake Hall 15, 26, 30, 212, 214, 310, 312, 316, 326
Related Terms: Westlake Hall, WES, Zoom Rooms, Zoom Room, Zoom, HyFlex, PC, Zoom Computer, Zoom PC